
Desert racing pushes your suspension system to its limits. To handle the punishing terrain, you need a firm setup capable of absorbing impacts and maintaining stability. Here’s a quick breakdown of what matters most:
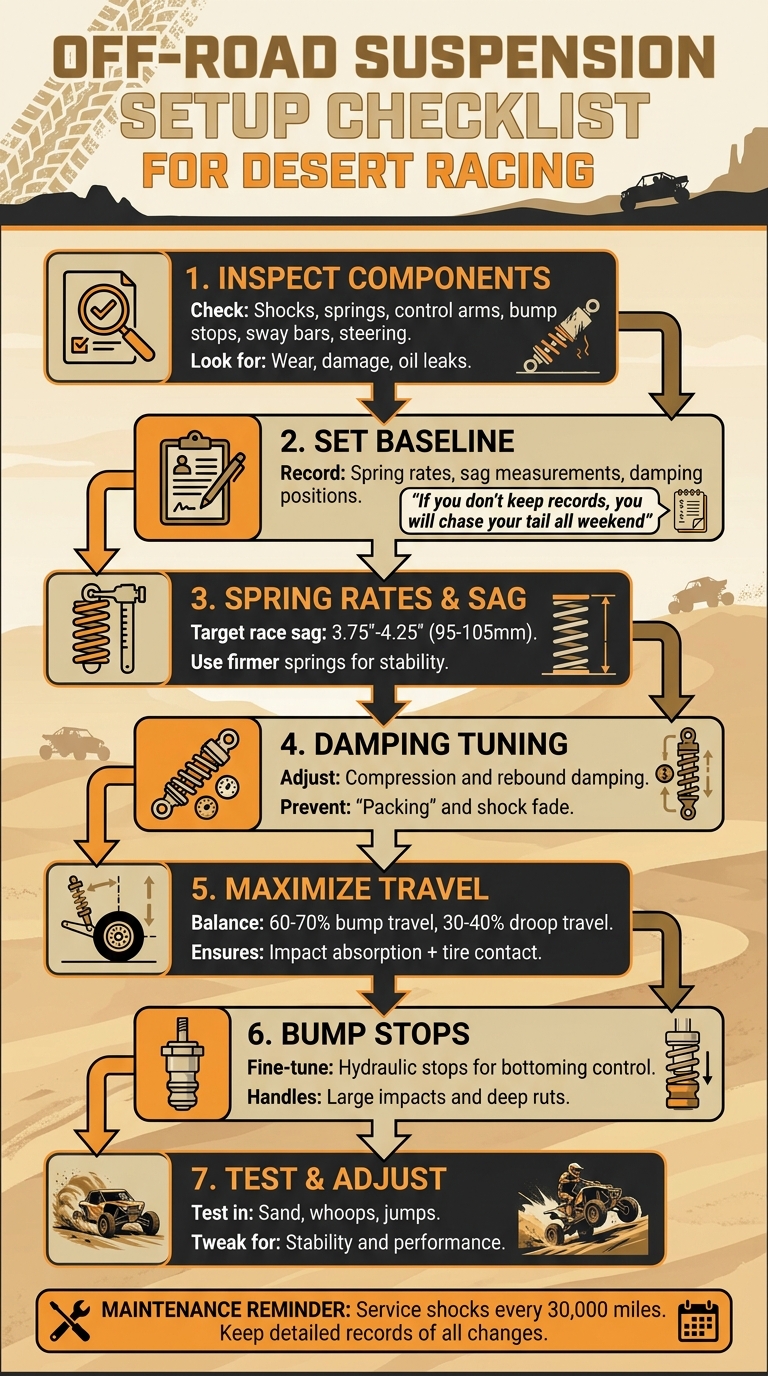
- Inspect Components: Check shocks, springs, control arms, bump stops, sway bars, and steering for wear or damage.
- Set Baseline: Record suspension settings like spring rates, sag, and damping positions to track adjustments.
- Spring Rates & Sag: Use firmer springs and aim for 3.75"-4.25" race sag for stability on rough terrain.
- Damping Tuning: Adjust compression and rebound damping to handle high-speed impacts and prevent "packing."
- Maximize Travel: Balance bump and droop travel for better impact absorption and tire contact.
- Bump Stops: Fine-tune hydraulic stops to control bottoming out during large impacts.
- Test & Adjust: Test settings in sand, whoops, and jumps, tweaking for stability and performance.
Regular inspections and precise adjustments are key to keeping your suspension reliable and competitive. Service shocks every 30,000 miles and keep detailed records of changes. This approach ensures your vehicle performs under the toughest desert conditions.
7-Step Desert Racing Suspension Setup Checklist
SxS RZR Race Prep | Seth Quintero’s Best In The Desert Set Up
sbb-itb-afc4690
Pre-Setup Inspection and Documentation
Before diving into desert racing, it’s crucial to start with a detailed system review. The intense conditions of desert racing push your suspension through thousands of cycles per minute, creating extreme heat and stress. A thorough inspection helps catch potential issues early, reducing the risk of failures during high-speed runs. This initial step lays the groundwork for fine-tuning your setup later.
Inspect Suspension Components
Begin by checking your shocks and reservoirs. Look for any oil leaks or signs of oil fade caused by heat. Ensure that external reservoirs remain undamaged and retain their heat-dissipating capabilities. Next, inspect your springs for cracks or wear. For dual or triple-rate setups, verify that the transition points between spring segments are functioning properly.
Examine the control arms and links for any damage or shifts in geometry, and check the bump stops – whether hydraulic or progressive – to ensure they can still handle end-of-stroke impacts. Review your limit straps for signs of fraying or stretching; compromised straps could lead to internal shock damage during high-speed extensions. Don’t overlook the sway bars and their mounting hardware, as these are essential for maintaining lateral stability and reducing body roll. Lastly, inspect your steering components for any looseness, as this can lead to dangerous oscillations at high speeds. Be sure to also check the chassis and frame for any cracks or signs of distortion.
Catching these issues early can save you from costly and dangerous failures during a race.
Once the inspection is complete, document the current setup to ensure precise adjustments later.
Record Baseline Settings
Nick Dole from Teknik Motorsport emphasizes the importance of keeping records:
"If you don’t keep records, you will chase your tail all weekend".
Start by noting the current compression and rebound clicker positions (measured from fully hard clockwise). Record spring rates, preload (comparing free versus installed lengths), as well as static and race sag measurements. If you measure sag without full gear, remember to add about 5 mm to account for the extra weight. These records will help you make consistent adjustments and avoid guesswork during your tuning process.
With your inspection complete and baseline settings documented, gather the tools you’ll need for adjustments.
Gather Necessary Tools
To fine-tune your setup, have the following tools on hand:
- A sag scale or tape measure for ride height measurements
- A torque wrench to confirm that all mounting hardware is securely tightened (especially after exposure to temperature changes)
- Adjustment wrenches for spring preload and damping clickers
- A notebook (or camera) to document settings
- A tire pressure gauge to ensure accurate PSI readings
Kris Keefer from Keefer Inc. Testing highlights the importance of sag measurements:
"The sag measurement is important because it gives the correct preload on the shock spring for your weight".
With the right tools and preparation, you’ll be ready to make accurate adjustments and optimize your suspension for desert racing.
Adjusting Spring Rates and Sag
Getting your spring rates and sag dialed in is the backbone of dependable desert racing performance. Unlike trail riding or crawling, desert terrain demands firmer springs to handle high-speed transitions and absorb impacts from jumps or drops. Once you’ve documented your baseline settings, it’s time to tweak your spring rates and sag for optimal results.
Set Static and Race Sag
Start by measuring your race sag, which is how much your suspension compresses under full race weight. Begin by lifting the vehicle to measure the fully extended length from a fixed swing-arm point to a marked spot on the rear fender. Then, gear up – including hydration packs and tools (about 15 lbs) – sit on the bike with your feet on the pegs, and have someone measure the same distance after bouncing the suspension to settle it. Subtract the compressed length from the extended length to calculate your race sag.
For desert racing, aim for 3.75" to 4.25" (95 to 105 mm) of race sag. This range is critical for maintaining stability in sand and handling unpredictable terrain.
Next, check your static sag, which is the sag under the vehicle’s weight alone. For linked suspension systems, aim for 1" to 1.25". For linkless systems like KTM‘s PDS, target 1.375" to 1.625". If you achieve proper race sag but have no free sag, your spring is too soft. On the other hand, excessive free sag means your spring is too stiff.
Fine-Tune Spring Preload
Adjust the preload using a hammer and blunt punch – avoid screwdrivers or chisels to protect the threads. For linked systems, stick to three complete turns from your baseline; for linkless systems, limit it to two turns. Always refer back to your baseline to avoid making overly drastic changes.
As Bruce’s Suspension emphasizes:
"You cannot substitute increasing or decreasing preload for the proper spring rate".
If you need to turn the preload collar beyond these limits to hit your target sag, it’s time to switch to a different spring rate. Overloading the spring with excessive preload can make your suspension harsh on small desert chatter bumps without improving its ability to handle big impacts. For better bottoming resistance, you’ll need a stiffer spring – not more preload.
Compression and Rebound Damping Tuning
Once you’ve set your spring rates and sag, it’s time to focus on damping. This is what controls the speed at which your suspension compresses and rebounds, making it essential for handling the rapid, repetitive impacts common in desert terrain. Compression damping, in particular, plays a key role in absorbing the high-speed hits from ruts, whoops, and dips.
Setting Compression Damping for Desert Terrain
Compression damping needs to be dialed in to cover three speed ranges effectively. Low-speed compression (LSC) deals with chassis roll and slow weight transfers, such as those encountered during rock crawling. Medium-speed compression (MSC) kicks in on moderately rough trails and dunes when traveling at 10–20 mph. Lastly, high-speed compression (HSC) is critical for handling the harsh impacts from whoops, jumps, and deep ruts.
A progressive shim stack is often the best choice for this kind of terrain. It remains soft during slower movements but stiffens as speeds increase. Crawlpedia describes it well:
"A standard progressive shim stack is the way to go most of the time… it allows [the shock] to be relatively soft during slow speed movement like rock crawling… and stiffer at higher speeds like blasting through the desert."
If your shocks come with external adjusters, use them to fine-tune compression settings for different conditions – tighten them up for aggressive desert runs and loosen them for technical trails. For internal adjustments, switching to thicker shims (e.g., from .012" to .015") can help if you’re bottoming out too often, while thinner shims can soften the ride over smaller bumps.
Once compression damping is set to handle a variety of impacts, it’s time to fine-tune rebound damping to keep the tires firmly planted.
Adjusting Rebound Damping
After dialing in compression, focus on rebound damping, which controls how quickly your shocks recover after a hit. In desert racing, a quicker rebound ensures your tires stay in contact with the ground during repeated, high-speed impacts. However, finding the right balance is key. If the rebound is too slow, the suspension may "pack", meaning it doesn’t fully extend before the next impact. This can lead to a loss of ride height and travel. On the flip side, if the rebound is too fast, it can cause bucking and instability.
During testing, pay attention to how the suspension behaves over consecutive bumps. If the vehicle feels lower and harsher, it might be a sign of packing. To address this, speed up the rebound by using thinner shims (around .008" to .012") or opening the external adjuster. Conversely, if the rear end kicks up after jumps, slow the rebound by adding thicker shims or closing the adjuster. The goal is to strike a balance where the suspension recovers quickly between hits without excessive bouncing.
Maximizing Suspension Travel and Bottoming Control
Once you’ve fine-tuned your damping settings, the next step is to maximize suspension travel. This ensures your suspension can handle impacts effectively while keeping your tires in contact with the ground. In desert racing, where terrain can be unpredictable, having enough bump travel to absorb large impacts and sufficient droop travel to maintain tire contact when the ground drops away is critical.
Maximizing suspension travel works hand-in-hand with your damping adjustments. This stage lays the groundwork for fine-tuning bump stops and controlling bottom-out performance.
Measure Suspension Travel
Start by measuring the total suspension travel. To break it down:
- Bump travel is the difference between the suspension’s static height and its fully compressed position.
- Droop travel is the difference between the static height and the fully extended (full droop) position.
To get these measurements, follow these steps:
- Lift the vehicle until the suspension reaches full droop. Measure the distance from a fixed point on the chassis to the axle.
- Lower the vehicle to its static ride height and record the same measurement.
- Compress the suspension fully using a jack under the control arm and measure again.
Subtract the full compression height from the static ride height to calculate bump travel. A well-balanced suspension setup usually has around 60–70% of its travel allocated to bump and 30–40% to droop. For instance, if your shock offers 4.7 inches of total travel, aim for about 3 inches of bump travel and 1.7 inches of droop. This balance provides enough compression for absorbing impacts like whoops and jumps while ensuring the tires stay planted during articulation.
For real-time feedback during testing, consider installing a shock travel indicator to monitor how much of the suspension travel you’re using.
Once you’ve confirmed the suspension has the right travel range, you can shift focus to optimizing bump stops for managing extreme impacts.
Set Up Bump Stops and Bottom-Out Control
Hydraulic bump stops, often called jounce shocks, are a great tool for absorbing the energy at the end of your suspension’s stroke. These stops compress progressively, starting with softer resistance and stiffening as they near full compression. This design helps cushion harsh impacts before they reach the chassis.
Adjusting your ride height or the engagement point of the bump stops is key to avoiding premature bottoming out. Lowering the ride height increases bump travel but reduces droop travel, so finding the right balance for your terrain is essential. During testing, pay close attention to how the suspension handles consecutive large impacts. If you’re consistently bottoming out hard, you might need stiffer bump stops or increased compression damping to handle the sudden forces caused by deep ruts and whoops.
This careful setup ensures your suspension can handle tough terrain without compromising performance or durability.
Final Testing and Desert-Specific Adjustments
Once your suspension components are dialed in, the next step is testing them on actual desert terrain. This is where you see how your adjustments hold up in real-world conditions. The goal here is to fine-tune your settings to tackle specific challenges like deep sand or high-speed whoops. This phase ensures that each tweak contributes to maximum control and stability on desert terrain. Be sure to document your observations during these tests for any further adjustments.
Test Suspension on Desert Terrain
Take your vehicle across various desert terrains to assess its performance. Pay attention to how it handles whoops, washes, and jumps, as these scenarios test the suspension’s ability to absorb impacts and maintain stability during high-speed hits. Watch for signs of "packing", where the suspension doesn’t fully extend after repeated impacts, leading to reduced ride height and control. Also, monitor for shock fade during extended high-speed runs. Desert conditions can cause shocks to cycle thousands of times per minute, generating heat that thins the oil and disrupts damping consistency.
If you notice bottoming out, adjust the high-speed compression by adding +2 clicks and the low-speed compression by +4 clicks. For air-sprung forks, increase the pressure by 5 psi and add a few clicks of rebound damping to balance the added spring force. Keep an eye on tire pressure as well – higher pressures are better suited for desert runs. They help reduce heat buildup, maintain tire shape, and prevent bead separation during aggressive driving.
Once you’ve completed these tests, shift your focus to optimizing settings for deep sand conditions.
Adjust for Deep Sand Stability
Deep sand presents unique challenges, often requiring specific adjustments to keep the front end stable and prevent it from feeling twitchy or diving. For high-speed sandy tracks, increase the rider sag to 112–116mm to boost stability. Additionally, lower the forks in the triple clamps by about 5mm (or to the top line). This adjustment increases trail, which slows down steering and enhances straight-line stability while still allowing smooth cornering.
"The goal is to have the front-end ride higher in the stroke than normal so the bike can find its own way around the track without feeling twitchy or nervous." – WP Suspension
As sand tracks degrade and whoops deepen during a race, you may need to stiffen your settings progressively. The table below provides a quick guide to recommended adjustments for deep sand performance:
| Adjustment Type | Desert/Sand Setting Change | Primary Benefit |
|---|---|---|
| Rider Sag | Increase to 112–116mm | Improved high-speed stability |
| Fork Position | Drop 5mm in triple clamps | Increased trail; slower steering |
| High-Speed Compression | Stiffen (+2 clicks) | Better bottoming control in deep bumps |
| Low-Speed Compression | Stiffen (+4 clicks) | Reduced chassis movement in G-outs |
| Air Fork Pressure | Increase +5 psi | Keeps front end higher in the stroke |
| Rebound Damping | Add +2 clicks (Slower) | Balances extra air pressure/spring force |
These adjustments are designed to improve stability and control in deep sand while maintaining performance across mixed terrain.
Conclusion
This checklist covers all the essential steps to fine-tune your vehicle for desert racing. From thorough inspections to precise damping adjustments, every action plays a critical role in performing well under the extreme demands of desert terrain.
Desert racing takes a toll on your suspension. High-speed impacts generate intense heat, thinning the shock oil and reducing damping efficiency over time. To keep everything in top shape, high-performance shocks should be professionally serviced every 20,000 to 50,000 miles, depending on how hard they’ve been pushed.
Keep detailed records of every adjustment – whether it’s a click, a preload change, or a sag measurement. These notes will become your go-to guide, saving you from starting over every time. As Mechaniquad aptly puts it:
"Suspension setup is the art of predicting how a vehicle should behave when it meets unpredictable terrain".
The main points are clear: prioritize a firm suspension setup to handle high-speed impacts, use large-diameter shocks (2.5 inches or larger) to manage heat buildup, and find the right damping balance to ensure the suspension recovers quickly after each hit.
Stick to a regular maintenance schedule – service shocks every 30,000 miles, monitor sag consistently, inspect for wear after desert runs, and tweak settings as terrain conditions change. By following these steps methodically, you’ll keep your suspension performing at its best and maintain a competitive edge in the harsh world of desert racing.
FAQs
How do I know if my spring rate is wrong?
When your suspension isn’t behaving as expected, it might be due to an incorrect spring rate. If the spring rate is too high, the suspension feels overly stiff, which can limit its ability to absorb bumps and reduce traction. On the other hand, a spring rate that’s too low can lead to excessive sagging, frequent bottoming out, or lack of control at higher speeds. Look out for signs like instability, excessive body roll, or frequent bottoming out, and consider adjusting the spring rate or preload to address these issues.
What are the quickest fixes for suspension packing?
The fastest way to address suspension packing is by tweaking the shock damping settings. Specifically, you’ll want to reduce the compression damping. This adjustment allows the suspension to handle bumps more smoothly, which is especially important for rough desert terrain. To do this, turn the compression adjuster counterclockwise. This softens the damping, making the suspension more responsive and minimizing packing problems.
When should I service my shocks for desert racing?
To keep your shocks in top shape, it’s essential to service them when you notice signs of wear, reduced performance, or after they’ve been through tough desert conditions. Regular upkeep ensures they perform well and last longer. Make it a habit to inspect and service your shocks periodically – especially before and after demanding desert racing events. This helps maintain control and reliability, even on the roughest terrain.
Leave a Reply